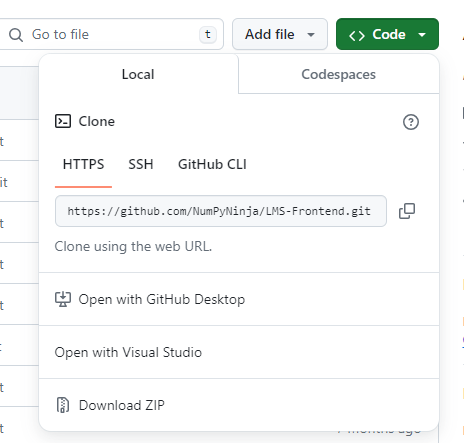
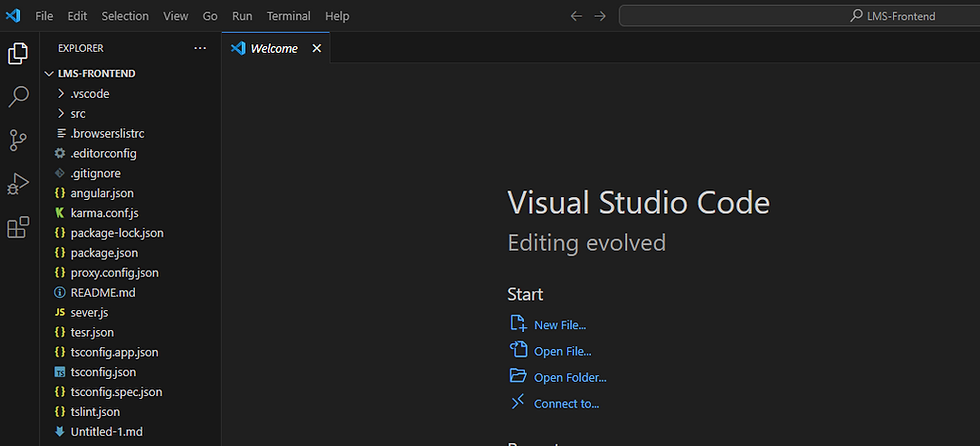
Let's learn together how to effortlessly clone a GitHub repository into Visual Studio Code, enhancing your development workflow by seamlessly integrating version control with your code editor. Cloning a GitHub repository involves fetching the cloud-based source code and bringing it into your local development environment. Also cloning a repository locally enhances development efficiency, flexibility, and collaboration.
Before we get Started make sure you have Git installed on your machine. VS Code uses your machine’s Git installation, so you don’t need to configure anything extra.
Before proceeding with the further steps, let me briefly introduce Visual Studio Code (VS Code) and GitHub.
Visual Studio Code (VS Code):
VS Code, commonly referred to as VS Code, is a source code editor developed by Microsoft. It’s available for Windows, Linux, macOS, and web browsers. Some of its features include debugging support, syntax highlighting, intelligent code completion, snippets, code refactoring, and embedded version control with Git (Wikipedia).
Git Hub:
GitHub is a developer platform that enables developers to create, store, manage, and share their code. It uses Git software, providing distributed version control along with access control, bug tracking, software feature requests, task management, continuous integration, and wikis for every project.
Now, let's see the steps to clone a Repository from GitHub to your local system using VS Code.
First, launch Visual Studio Code on your computer.
To access the source control view, on the main window, click on the “Source Control” icon in the sidebar (or use the shortcut Ctrl+Shift+G or Cmd+Shift+G on Mac).
Next, Choose “Clone Repository” from the Source Control view.
Then, paste the repository URL you copied from GitHub.
Press Enter to initiate the cloning process. If it’s a GitHub repository, VS Code will prompt you to authenticate with your GitHub account.
Select the repository you want to clone to your local machine.
Then, you will be asked to select the repository destination. Select a folder or create a new one.
After you select the folder, it will start cloning the remote repository.
Once the cloning is done, you will be prompted to open the cloned repository as shown in the screenshot below and you can select open.
VOILA!!! You’ve successfully cloned the Git repository in your VS Code. Now you can collaborate, make changes, and manage your code using Git in VS Code.
Here are some popular Git commands you can use to manage your codebase:
Git: Create Branch: Quickly create a new branch by providing the name of your new branch. VS Code will create the branch and switch to it. You can also specify which commit the new branch should be pointing to.
Git Bash: Set up VS Code as your default Git editor, allowing you to use VS Code to edit commit messages and other Git-related files. Git Bash is a popular shell environment for Windows that provides a Unix-like command-line interface for working with Git and other command-line tools.
Git Clone: Download the source code using the clone command. For example, to download a project from GitHub, you can click on the green button (clone or download), copy the URL in the box, and paste it after the git clone command.
Git Add: Stage changes in your working directory to prepare them for the next commit. You can use git add . to stage all changes or git add <file> to stage a specific file.
Git Commit: Commit staged changes with a commit message. You can use git commit -m "[Type in the commit message]" to commit changes with a specific message.
Git Push: Push changes to a remote repository. You can use git push to push changes to the default branch or git push <branch> to push changes to a specific branch.
Git Pull: Pull changes from a remote repository. You can use git pull to pull changes from the default branch or git pull <branch> to pull changes from a specific branch.
Git Status: View the status of your repository, including changes, unstaged changes, and untracked files.
Git Log: View a log of all commits in your repository, including commit messages and authors.
Git Diff: View the differences between your local changes and the last commit.
Now, Let's explore some tips on using source control effectively on VS Code. The Source Control view enhances your Git experience by providing a convenient interface for managing version control directly within VS Code.
Instead of using Git commands, you can use these Git shortcuts in the Source Control Panel.
A few advantages of using the Source Control view in Visual Studio Code (VS Code) include:
Efficient Workflow:
The Source Control view streamlines your Git workflow within VS Code.
You can stage, commit, and push changes directly from the editor.
It provides a visual representation of your repository’s status.
Visual Diff and History:
Easily compare changes between commits, branches, and files.
View commit history, including who made changes and when.
Understand code evolution through visual diffs.
Conflict Resolution:
Resolve merge conflicts visually.
Use tools like “Accept Current Change” or “Accept Incoming Change.”
Branch Management:
Create, switch, and delete branches.
Visualize branch relationships and switch between them.
Integrated Git Commands:
Execute common Git commands without leaving VS Code.
No need to switch to the terminal for basic Git operations.
On the top of the Source Control view, you will see the current working directory and when you click on more actions, you will get a dropdown menu as shown in the screenshot. There we have the options to:
Refresh the code
Pull changes from the remote repository
Push changes to the repository
Clone to download the source code
Checkout to a different branch in the same repository
Fetch to download the latest commits, files, and references from the remote repository
Commit will show a list of options to commit one of the local changes, commit all changes, commit staged changes, etc.
Changes will provide options to stage, unstage, and discard all local changes.
Pull, Push will also provide more functionalities to pull and push changes from and to remote repositories.
Branch has options to create, remove, merge, rebase, and publish our local branch.
Remote is for adding or removing remote.
Stash will show all the latest stashed changes and list the options for working with your latest stash.
Tags are used for creating and deleting tags.
Once you make any changes in your code, it will appear in the source control panel. There you will have the options to:
Commit - you can commit changes to your local repository by clicking the “Commit” button in the Source Control view. This will open the Commit Changes panel, where you can enter a commit message and select the files you want to commit.
Changes- it shows a list of all the changes you’ve made to your files, including new files, modified files, and deleted files. You can use the Changes view to review the changes you’ve made and select which changes you want to commit.
Happy Coding!!
_edited_edited.png)


