What is a CI/CD Pipeline?
A CI/CD pipeline is an automated process that builds, tests, and deploys an application whenever developers make changes to the code and merge it into a shared repository.
Why Do We Need a CI/CD Pipeline?
Saves time and effort by reducing repetitive tasks.
Minimizes human errors in the deployment process.
Automates the deployment of changes, enabling faster updates.
Customizable based on project needs.
Catches bugs early through automated testing.
Makes it easier to identify issues due to small, incremental deployments.
CI/CD Tools
CI Tools: Jenkins, GitHub Actions, CircleCI.
CD Tools: AWS CodePipeline, GitLab CI/CD.
Full CI/CD Tools: GitHub Actions, Azure DevOps.
Why Use GitHub Actions?
There is no need for external CI/CD tools as workflows can trigger from repository events.
It is easier to implement compared to other tools, requiring less manual configuration.
Budget-friendly, especially for small projects or open-source work. GitHub Actions is free for public repositories and offers 400 free build minutes for private repositories.
Compatible with multiple platforms, including AWS and Azure.
Prerequisites
AWS account with a running EC2 instance (with Java 17 installed, or the version required by your application, to avoid compatibility issues).
Code repository on GitHub for your application.
A Spring Boot application.
AWS Management Console with programmatic access and permissions for deployment.
AWS IAM user’s access key. An access key is essential for programmatic access to AWS resources. It consists of an access key ID and a secret access key, which together enable secure authentication of requests to AWS services. To ensure security, the access key should be stored in a secure location, such as AWS Secrets Manager, GitHub Secrets, or an encrypted file, and should not be hard-coded into application code..
Steps to deploy using GitHub Actions
1. Configure the AWS secrets in the GitHub repository.
AWS secrets are the data that GitHub action workflow requires in the runtime to be able to deploy the application to AWS. The secrets typically include information such as access keys, passwords, or other authentication details necessary for securely interacting with external services like AWS. For instance, an EC2 SSH key is needed to log into an instance, while host DNS and usernames are required to identify and authenticate the target system.
Below are the secrets that have to be added to the repository.
Host DNS
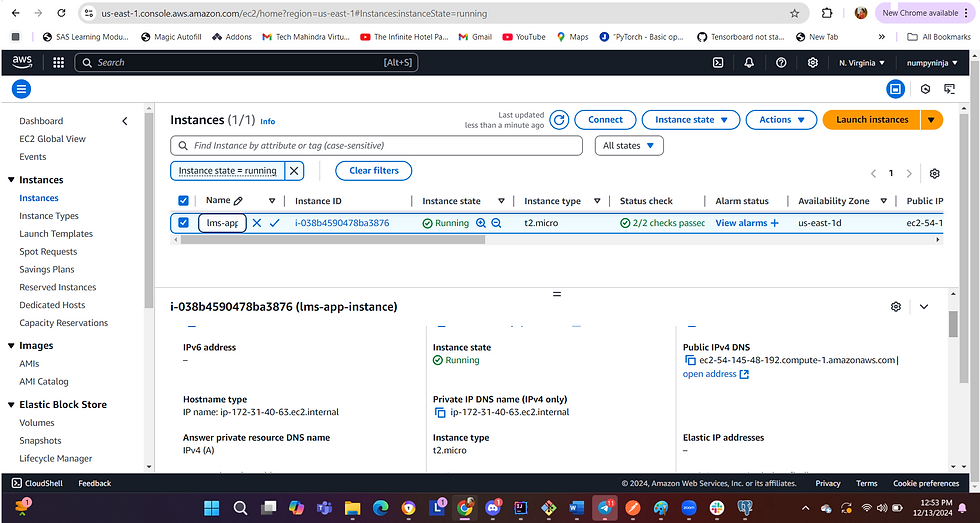
Host DNS is the public IPv4 DNS of the running EC2 instance, this detail is required for GitHub to connect to a particular EC2 instance.
EC2 SSH KEY
This is a confidential key that is used as an authentication mechanism to connect to the EC2 instance, and thus this is stored as a secret when AWS authenticates the Github. AWS places this key in ~/.ssh/authorized_keys file in .pem format.
If the key is in .ppk format, convert it to .pem format using the following steps:
a. Install PuTTY tools:
b. Convert .ppk to openssh private key
Note: If you encounter this error “Unrecognized command -O” for puttygen command, it means you are using older version of puttygen command , so as a alternative you can use GUI as below
Open puttygen CLI.
Click load and select the .ppk file.
After loading, click Conversions tab in the top menu
Choose Export OpenSSH key.
Save the file in .pem format.
Open the file and test if it is in correct format. It must begin as follow
-----BEGIN OPENSSH PRIVATE KEY-----
Copy all the contents of the file including ----BEGIN , ------END and add it a repository secret.
Username
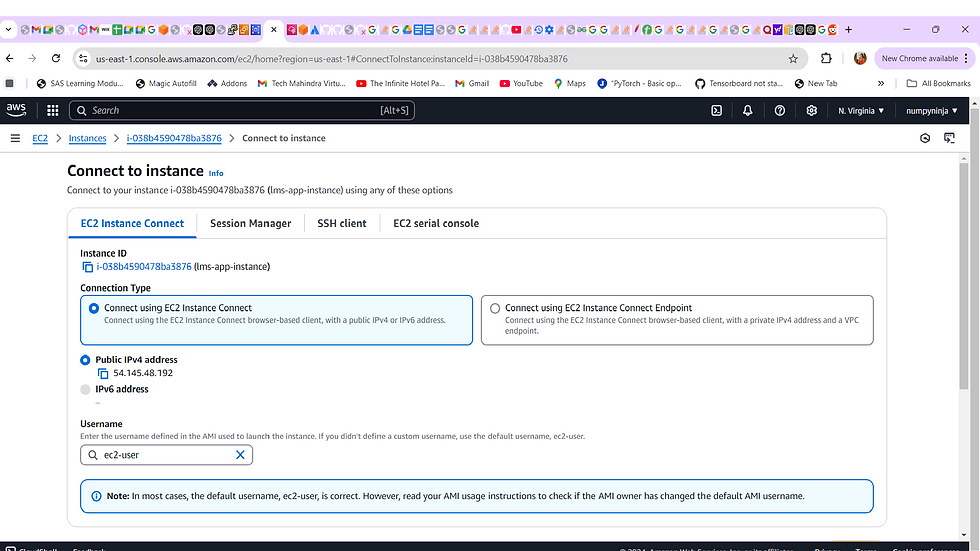
The default username of the EC2 instance varies based on the OS of the instance. You can find the username by clicking "Connect" on the EC2 instance dashboard.. Since Linux machine is used here in this example, ec2-user is the default username.
How to configure AWS secrets in GitHub
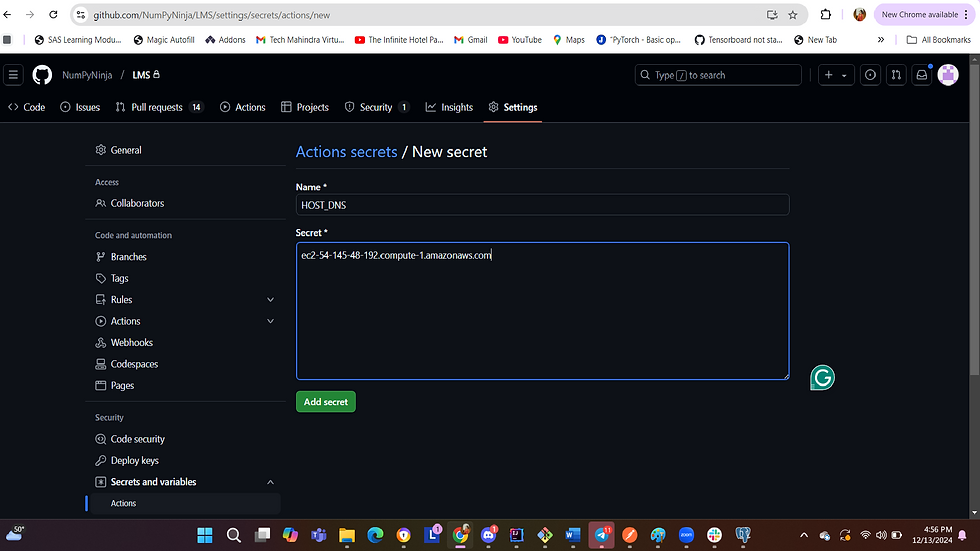
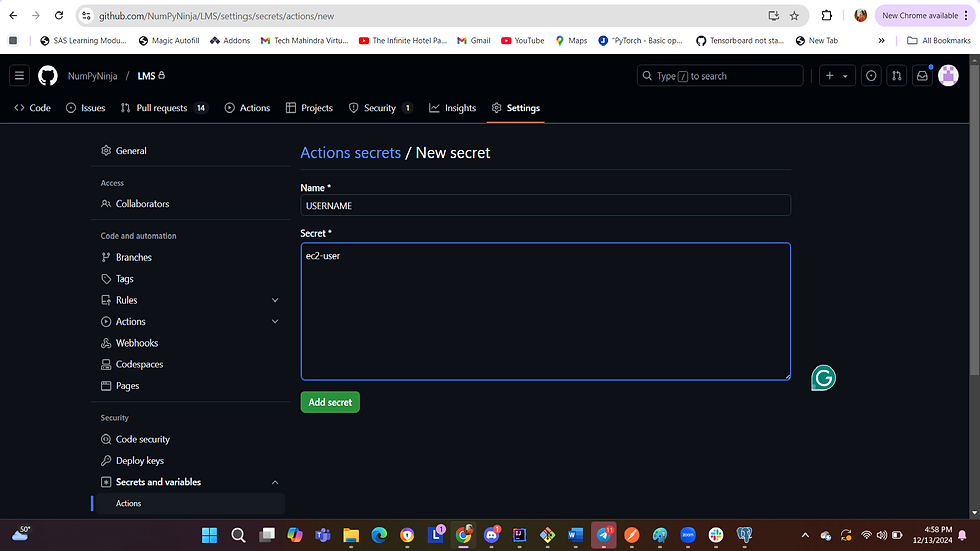
Go to Settings->Secrets and variables-> Actions ->New repository secret and add the secrets one by one.
a. Add the secret, HOST_DNS with the EC2 instance DNS value.
b. Add the secret, USERNAME with username of EC2 instance.
c. Add the secret, EC2_SSH_KEY with the contents of .pem file.
Sample of repository secret, USERNAME and HOST_DNS are below
Build the workflow file and define the steps.
Create a workflow file, .github/worflows/<filename>.yml in the application repository as below.

Update the contents of the workflow file as the following
Detailed Breakdown of the workflow file:
1. Trigger: The workflow triggers on every push to the main branch.
2. Runs-on:
The OS of the Github runner that builds, tests and deploys our repository code.
3. Checkout Code:
Uses the actions/checkout@v3 action to checkout the repository code.
4. Set Up JDK:
Configures the Java version (e.g., Java 17) using actions/setup-java@v3 in the runner.
5. Build with Maven:
The mvn clean package command compiles the Spring Boot application and generates a JAR file in the target directory.
6. Set Up SSH:
Uses the webfactory/ssh-agent action to securely add the private key for SSH access to the EC2 instance.
7. Deploy to EC2:
Upload JAR: The scp command uploads the JAR file to the EC2 instance. The systemctl commands are to stop the service that was running before and to start the service with the new jar file. The systemctl commands and details of lms-aws.service file are detailed below.
Create a Systemd Service File
The systemctl commands are used for service management and for managing the service, the systemd Unit file(i.e lms_aws.service) to stop and start the service must be present in the EC2 instance. This systemd file(lms_aws.service) must be placed in etc/system/system path. It is a good practice to name the service file as .jar file name to identify the service file, in case there are many services in the same EC2 instance. The systemd service file consists of 3 sections, Unit, Service and Install.
The Unit section denotes the metadata and dependencies of the service, the service section contains all the configurations of the service and the Install section mentions how the service must be enabled.
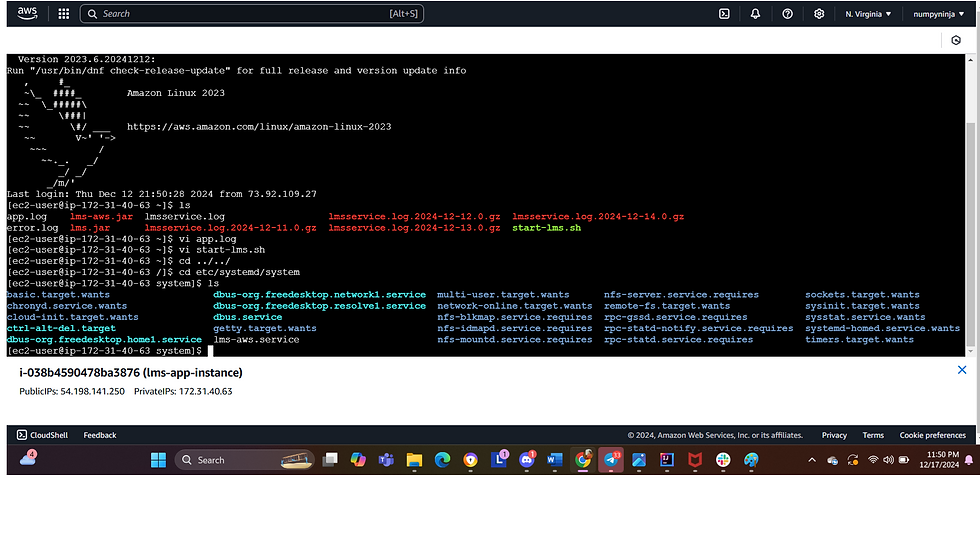
Create a file named lms-aws.service in /etc/systemd/system with the following content:
Detailed breakdown of service file
1. [Unit] Section
Description=Spring Boot Application for LMS
- A short description of the service.
After=network.target
- Specifies that the service should start only after the network is up.
2. [Service] Section
User=ec2-user
- The Linux username of the EC2 user account, ec2-user is the default username for Linux ec2 instance.
WorkingDirectory=/home/ec2-user
- Specifies the directory to which the Github transfers the .jar file(lms-aws.jar). In this example, we used scp -o StrictHostKeyChecking=no target/*.jar ${{ secrets.USERNAME }}@${{ secrets.HOST_DNS }}:/home/ec2-user/lms.jar in the workflow file and thus the working directory is /home/ec2-user.
ExecStart=/usr/bin/java -jar /home/ec2-user/lms-aws.jar
- The command to start the application.
- /usr/bin/java specifies the Java binary, and -jar indicates that the application is packaged as a JAR file.
-/home/ec2-user/lms-aws.jar is the Spring Boot application's JAR file.
Restart=no
- Specifies the service should not automatically restart if the application stops or crashes.
- Other options are always, on-failure, or on-abort.
StandardOutput=file:/home/ec2-user/app.log
- Redirects standard output (stdout) to a log file: /home/ec2-user/app.log.
- Useful for debugging and tracking application logs.
StandardError=file:/home/ec2-user/error.log
- Redirects standard error (stderr) to a log file: /home/ec2-user/error.log.
- Helps in capturing application errors separately.
StandardOutput and StandardError: Redirects logs to specific files. For example, to access these log files for debugging, you can use command like cat /home/ec2-user/app.log to view their contents This helps in diagnosing issues and understanding the behavior of your application in real-time.
3. [Install] Section
WantedBy=multi-user.target
multi-user.target is a standard target for multi-user systems, typical for servers.
After the service file is saved, use the commands below
Reload the system to recognize the new service. Reload the daemon should be done every time a change is made to the service file.
In the path, /etc/systemd/system, use the command below
To start a specific service, use the following command
If the service has to be started at boot, use the command below
The following command can be used to check the status of the service that is started. Any errors with the service startup will be displayed with this command.
Test the workflow
If everything is configured correctly, the application will be deployed to AWS whenever a change is committed to the main branch in the GitHub repository.
Navigate to Actions Tab in the GitHub to check the workflow runs for errors. The workflow with green ticks indicate successful runs. Click the workflow run with red tick to debug the cause of failure.
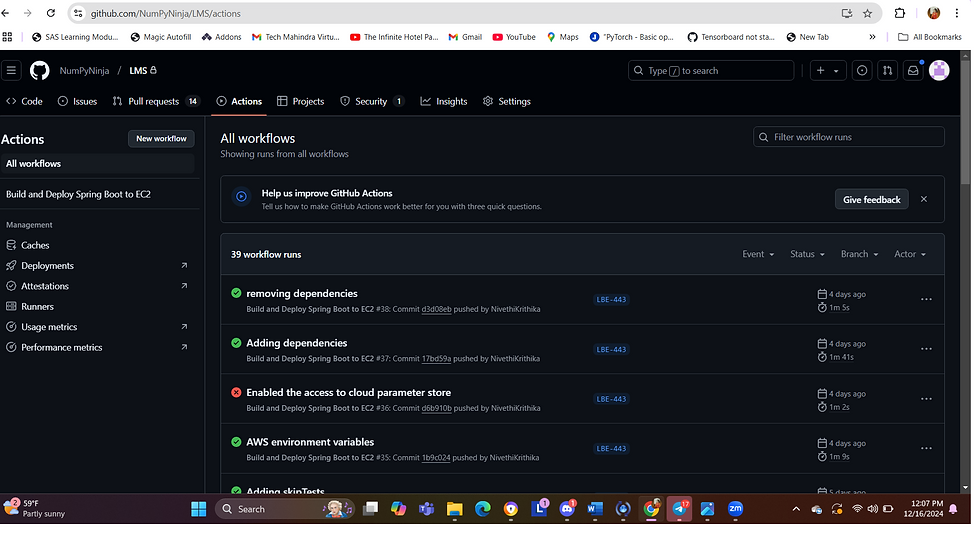
To check if the application is started in AWS, check the application log (/home/ec2-user/app.log) and the error log (/home/ec2-user/error.log) to ensure the service is running correctly and environment variables are resolved properly.
This blog continues with the title 'Using Profiles and Environment Variables to Deploy a Spring Boot Application in a CI/CD Workflow with GitHub Actions,' which explains how profiles can be used in CI/CD deployment on AWS.
_edited_edited.png)